Hi Stampers!
I am participating in another Stampin' Up!® Demonstrator Training Program Monthly Blog Hop! They are so fun! I am so happy that you could join us today for this blog hop for ideas and creative inspiration. We are a group of Stampin' Up!® Demonstrators from around the world that are taking part in training that is helping us to build a successful Stampin' Up!® business and reach some goals we have set. We really appreciate your support.
You may be starting here or have come from another blog - either way you can find the link list at the bottom of this post so that you can see every blog post today. This is my customer Thank You cards for March. They are using recently retired Sale-a-Bration Designer Series Paper (DSP), Sunshine & Rainbows, which I absolutely LOVE! It is so bright and cheery. I recently made this card for a sketch challenge, and I liked it so much that I decided to change the sentiment to Thanks and mass produce it as my customer thank you cards for March! The sentiment is from the Biggest Wish stamp set that is one of my go-to sets for big, bold sentiments.
Here are the instructions for how I did it:
- Stamp the Thanks sentiment from Biggest Wish stamp set in Melon Mambo ink on scrap of Basic White and cut it out with the Cloud punch.
- Cut a second Basic White cloud and two of the decorative clouds from the Sunshine & Rainbows DSP. Also fussy cut a rainbow from the same DSP.
- Adhere a large DSP panel on a Melon Mambo Mat on onto the Bermuda Bay card base.
- Place the rainbow to the right side of the center of card, and arrange the clouds around the base of the rainbow and pop the sentiment with dimensionals.
- Add some jewels from the new Waves bundle sporadically around the card front.
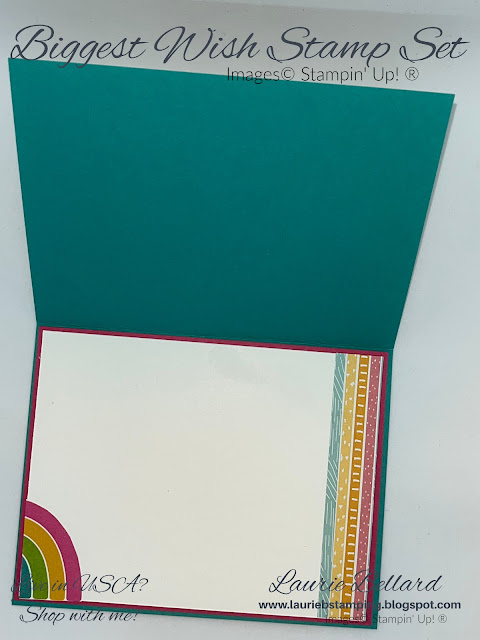
- Adhere another strip of DSP to the right side of a second Basic White panel and half a rainbow on the lower left corner and adhered it to the card inside.
- Using the negative outline from a cloud punch out, sponge on the lower left corner of the envelope front with a blending brush and Bermuda Bay ink.
- Adhere the remaining piece of DSP to the envelope flap with multipurpose glue and trim the excess with paper snips.
The card is simple to put together which made quick work of the stack of cards I needed to create. I hope my customers will like receiving the cards as much as I liked making them.
If you want to recreate these cards, the measurements and supplies I used are below. If you need any supplies you can click on the item to be taken straight to that item in my online store to shop with me for whatever you need.
Thanks for stopping by my blog and use the links below to continue on with the hop.
Blog Hop Links:
Until next time...
Happy Stamping!
Laurie B.
Bermuda Bay CS – 8 1/2" x 5 1/2", scored at 4 1/4"- card base
Melon Mambo CS - 2 @ 5 3/8" x 4 1/8" - card front & inside mats
Basic White CS - 5 1/4" x 4"- card inside; 2 @ 2" x 2" - cloud punches
Rainbow & Sunshine DSP - 1 @ 5 1/4" x 4" - card front DSP layer, cloud and rainbow punch outs; 2" x 6" - envelope flap


Love your bright and cheery card!
ReplyDeleteThis comment has been removed by the author.
ReplyDeleteThis card is so sweet Laurie! It makes me so happy. Thank you for taking part in our Demonstrator Blog Hop this month.
ReplyDeleteLove the rainbows. Thanks for sharing.
ReplyDeleteLove the happy rainbow cards.
ReplyDeleteLove how you've used the clouds for the layout!
ReplyDeleteWhat a bright and cheerful card Laurie x
ReplyDeleteSo colorful and cheery. Cute card!
ReplyDeleteFabulous Cards!!!😊
ReplyDeleteYour cards are so happy! I love everything about them and their matching envelopes! :)
ReplyDeleteBright and cheerful cards. 😀
ReplyDeleteNice card you create, thank you for doing this and have a wonderful day.
ReplyDelete